A used RV may cost less than a comparable new model, but its condition and history matter as much as the purchase price. This used RV buying checklist covers the financial documents, ownership records, exterior components, interior systems, and professional inspections you should review before committing to a motorhome, travel trailer, fifth wheel, or pop-up camper.
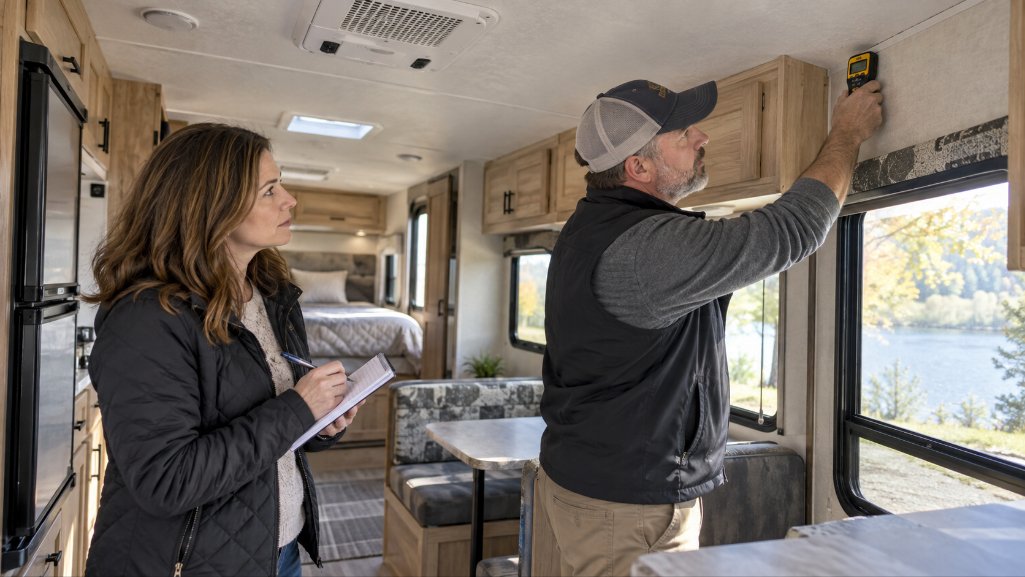
Do not let fresh upholstery or a spotless kitchen rush your decision. Water intrusion, roof damage, aging tires, neglected maintenance, and electrical problems may remain hidden during a quick walkthrough.
Used RV buying checklist at a glance
| Area | What to check | Why it matters |
|---|---|---|
| Purchase price | Compare the asking price with similar RVs and available valuation resources | The price can affect your down payment and available financing |
| Title and liens | Confirm ownership, VIN, title status, and any outstanding lien | The seller must have the ability to transfer clear ownership |
| Water damage | Check ceilings, walls, floors, cabinets, windows, and storage areas | Water intrusion can cause rot, mold, and structural damage |
| Roof and seals | Inspect seams, vents, skylights, antennas, windows, doors, and slide-outs | Cracked or missing sealant can allow water into the RV |
| Tires | Review tire age, tread, sidewalls, inflation, and wear patterns | RV tires can age out before the tread wears down |
| Appliances | Operate the refrigerator, stove, oven, water heater, furnace, and air conditioner | Replacement parts and repairs can add to your ownership costs |
| Plumbing | Test faucets, pumps, tanks, drains, toilets, and water connections | Leaks can damage the RV and may be difficult to trace |
| Electrical systems | Test shore power, batteries, outlets, lights, converter, inverter, and control panels | Electrical problems can affect several RV systems |
| Generator | Check hours, service records, startup, load operation, and exhaust | A poorly maintained generator may require substantial repairs |
| Maintenance records | Review service receipts, inspections, repairs, and winterization history | Records help show how the RV was maintained |
| Recalls | Search the VIN and ask whether recall work was completed | Unresolved recalls may affect vehicle components or installed equipment |
| Professional inspection | Hire an independent inspector familiar with the RV type | A trained inspector may identify concerns missed during your walkthrough |
1. Establish your complete RV budget
Start with the amount you can spend without overlooking the ongoing cost of ownership. Your budget should include more than the seller’s asking price.
Estimate the cost of:
- Your down payment
- Your estimated monthly loan payment
- Insurance
- Registration
- Storage
- Fuel
- Campground reservations
- Routine maintenance
- Winterization
- Immediate repairs
- Replacement tires and batteries
- Accessories or towing equipment
Use the PDCU RV loan calculator to compare estimated payments using different purchase prices, down payments, rates, and loan terms. Calculator results are estimates and do not guarantee approval or final financing.
2. Research the RV’s market value
Compare the asking price with similar RVs of the same year, make, model, mileage, floor plan, and condition. Review dealer inventory and private listings when possible.
Options and upgrades may affect value, but they do not always increase it by the amount the seller originally paid. Solar panels, batteries, towing equipment, suspension upgrades, and remodeled interiors should be evaluated based on their condition and usefulness.
A lender may assign a collateral value that differs from the seller’s asking price. If the price exceeds that value, you may need a larger down payment or a lower purchase price.
3. Look for signs of water damage
Water damage is one of the most important concerns when inspecting a used RV. A small roof or window leak can spread through insulation, walls, ceilings, cabinets, and flooring.
Use your eyes, hands, and nose during the walkthrough. Check for:
- Ceiling or wall stains
- Soft areas in the floor
- Ripples or bubbles in wall coverings
- Swollen cabinets or trim
- Discoloration around windows and vents
- Musty odors
- Visible mold or mildew
- Rust on screws or metal fixtures
- Delamination on exterior walls
- Fresh paint or new paneling in one isolated area
Open every cabinet, closet, storage compartment, and access panel. Pay special attention to corners, areas under windows, spaces around slide-outs, and the floor near plumbing fixtures.
A moisture meter can help locate damp areas that are not visible. Ask a professional inspector to interpret the readings because construction materials and environmental conditions can affect the results.
4. Inspect the roof

The roof protects nearly every system and surface below it. Ask when the roof was last inspected, cleaned, repaired, or resealed.
A roof inspection should include:
- Roof membrane condition
- Front and rear seams
- Side edges
- Roof vents
- Skylights
- Air conditioner openings
- Antennas and mounting hardware
- Solar panel mounts
- Ladder attachment points
- Previous patches or repairs
Look for cracks, gaps, loose sealant, punctures, bubbles, standing water, and soft areas. Do not climb onto an RV roof unless the manufacturer permits it and you can do so safely. A qualified inspector should handle roof access when there is any doubt.
5. Check exterior seals and seams
Inspect the sealant around windows, doors, storage compartments, lights, vents, utility connections, and slide-outs. Sealant that is cracked, separated, missing, or covered by repeated patches may indicate deferred maintenance.
Open and close every exterior compartment. Check whether the doors sit squarely, latch correctly, and keep water out. Examine the compartment floors and walls for staining or softness.
Inspect slide-out seals with the rooms extended and retracted. Torn or hardened seals may allow water and debris inside.
6. Inspect the tires, wheels, and suspension
Do not judge RV tires by tread depth alone. Tires can deteriorate from age, sunlight, storage conditions, underinflation, and long periods without use.
Check:
- The date code on each tire
- Sidewall cracks or bulges
- Uneven tread wear
- Proper load rating
- Matching tire sizes
- Valve stem condition
- Wheel damage or corrosion
- Signs of axle or alignment problems
- The condition of the spare tire
For a towable RV, ask when the wheel bearings and brakes were last serviced. For a motorhome, have the steering, suspension, brakes, engine, and drivetrain inspected by a qualified mechanic.
7. Test every appliance
Do not accept “it worked last season” as an appliance test. Operate each appliance using every available power source when possible.
Test the:
- Refrigerator
- Freezer
- Stove burners
- Oven
- Microwave
- Furnace
- Air conditioner
- Water heater
- Vent fans
- Washer or dryer, when equipped
- Automatic leveling system
- Slide-out motors and controls
- Awning
Some RV refrigerators and water heaters operate on more than one energy source. Confirm that each operating mode works. Ask the inspector to check propane lines and appliances for proper operation and signs of leaks.
8. Test the plumbing system
Connect the RV to an appropriate water source or fill the fresh-water tank so the system can be tested under pressure.
Check:
- The fresh-water pump
- Faucets and shower fixtures
- The toilet
- The water heater
- Indoor and outdoor showers
- Drainpipes and traps
- Fresh, gray, and black tanks
- Tank level sensors
- Low-point drains
- Water filters and pressure regulators
- Exterior water connections
Look under sinks, inside cabinets, around the water heater, and beneath the RV while water is running. Slow drips can be easy to miss.
Ask how the RV was winterized and whether freezing damage has ever occurred. Cracked fittings, pumps, tanks, or water-heater components may leak only when the system is pressurized.
9. Review the electrical systems
An RV may contain separate 12-volt DC and 120-volt AC electrical systems. Depending on the RV, it may also have solar panels, an inverter, multiple batteries, or an automatic transfer switch.
Have the inspector test:
- Interior and exterior lights
- Electrical outlets
- Ground-fault circuit interrupter outlets
- House batteries
- Battery charger and converter
- Inverter
- Shore-power connection and cord
- Circuit breakers and fuses
- Solar panels and charge controller
- Monitoring and control panels
- Emergency detectors
Look for loose wires, damaged insulation, overheated connections, corrosion, and unmarked modifications. Improvised electrical work should receive closer review from a qualified technician.
10. Inspect and operate the generator
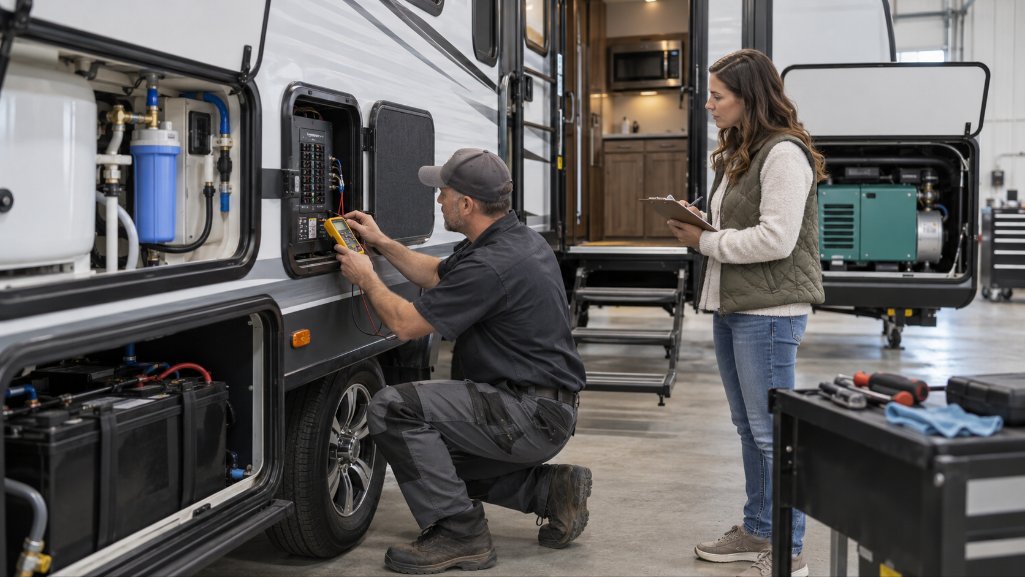
If the RV includes a generator, ask for its hour reading and maintenance records. A generator with low hours is not automatically in better condition. Long periods without operation can also cause problems.
Start the generator from cold and let it reach normal operating temperature. Then test it under load by running appropriate RV appliances.
Watch for:
- Hard starting
- Unusual noise or vibration
- Smoke
- Fuel or oil leaks
- Unstable power output
- Shutdowns when a load is applied
- Exhaust damage
- Missing maintenance records
Confirm that the generator’s exhaust system directs fumes away from the RV and does not have visible damage.
11. Request maintenance and repair records
Maintenance records can show whether the previous owner followed a regular service schedule. They can also reveal recurring problems.
Ask for documentation related to:
- Roof inspections and resealing
- Water-damage repairs
- Tire replacements
- Wheel-bearing and brake service
- Generator maintenance
- Engine and transmission service
- Battery replacements
- Appliance repairs
- Winterization
- Insurance claims
- Manufacturer warranty work
- Recall repairs
Compare service dates with the RV’s mileage and generator hours. Missing records do not prove poor maintenance, but they leave you with less information about its condition.
12. Verify the title and VIN
Compare the vehicle identification number on the RV with the VIN shown on the title. Motorhomes and towable RVs may display the VIN in different locations, so ask the inspector or manufacturer if you cannot find it.
Confirm that:
- The seller’s name matches the owner shown on the title.
- The VIN matches the RV.
- The year, make, and model are correct.
- Every required owner can sign the title.
- The title has no unexplained alterations.
- The title status matches the seller’s description.
- Any existing lien has been released or will be paid during the transaction.
Michigan buyers can review current requirements through the Michigan Secretary of State vehicle ownership resources.
13. Check for liens
A lien gives a lender or another party a recorded financial interest in the RV. Ask the seller directly whether money is still owed, then review the title and supporting documents.
If a lien exists, request a current payoff statement from the lienholder. Your lender may need to coordinate payment and the lien release before ownership can transfer.
Do not give the full payment directly to a seller with an unresolved lien. Ask your lender how the seller, existing lienholder, and title will be handled.
14. Search for recalls
Search for safety recalls using the RV’s VIN. Motorhomes can include components from both the chassis manufacturer and the RV manufacturer, so confirm whether each source has been checked.
The federal NHTSA recall lookup allows consumers to search a VIN for unrepaired safety recalls. Ask the seller for documentation showing whether applicable recall work was completed.
Installed appliances and equipment may have separate manufacturer recalls. Check the model and serial numbers for refrigerators, furnaces, water heaters, generators, and other major equipment when concerns arise.
15. Hire a professional RV inspector
A professional inspection is useful even if you have owned an RV before. RVs combine structural, mechanical, plumbing, electrical, propane, appliance, and vehicle systems in one unit.
Choose an inspector who:
- Works independently from the seller
- Has experience with the type of RV you are buying
- Provides a written report with photos
- Uses appropriate testing equipment
- Can explain which findings need immediate attention
- Allows you to attend the inspection when possible
A motorhome may also need a separate mechanical inspection. An RV inspector may examine the living systems while a qualified mechanic evaluates the engine, transmission, brakes, suspension, and drivetrain.
Use the inspection findings to review the deal
Do not treat every inspection finding as a reason to reject the RV. Used RVs normally show some wear. Focus on safety, structural integrity, water intrusion, major system failures, and the likely cost of repairs.
After receiving the report, you can:
- Proceed at the agreed price
- Request that specific repairs be completed
- Negotiate a lower purchase price
- Adjust your repair budget
- Ask the lender whether the findings affect financing
- Choose a different RV
Get any negotiated repairs or price changes in writing.
Arrange financing before committing to the purchase
An RV loan pre-approval can help you establish a potential financing range before you shop. Final approval can depend on your application, requested amount, and the RV’s age, value, condition, and title status.
People Driven Credit Union offers financing for eligible new and used motorhomes, fifth wheels, travel trailers, and pop-up campers. Review the RV, inspection report, purchase price, and title information with your lender before completing the sale.
Used RV buying checklist FAQs
Water intrusion is one of the most important concerns because it can damage the roof, walls, insulation, cabinets, and flooring. A complete inspection should also cover the tires, appliances, plumbing, electrical systems, generator, and mechanical components.
Look for stains, soft floors, swollen cabinets, wall bubbles, musty odors, mold, rusted fasteners, and exterior delamination. A professional inspector may use a moisture meter to check areas that appear dry.
Yes. Check the roof membrane, seams, vents, skylights, air conditioner openings, mounting points, sealant, and previous repairs. Use a professional inspector if you cannot access the roof safely.
Review the date code molded into each tire’s sidewall. Also inspect the tread, sidewalls, valve stems, load rating, and wear patterns. Ask a tire professional if you are unsure how to interpret the code or condition.
Yes. Operate the refrigerator, furnace, air conditioner, water heater, stove, oven, and other installed equipment. Test each available operating mode when possible.
Search the VIN through NHTSA and check with the RV, chassis, appliance, and equipment manufacturers when appropriate. Ask the seller for documentation showing that applicable recall repairs were completed.
A professional inspection can be useful whether you buy from a dealership or private seller. It gives you an independent review of the RV’s condition before you complete the purchase.
It may. Significant damage or a value that does not support the purchase price could affect the available loan amount or approval. Discuss material inspection findings with your lender before completing the sale.

John Scharff is the Digital Marketing Lead at People Driven Credit Union, where he helps create clear, practical financial content for members and the communities PDCU serves. He focuses on making financial topics easier to understand, from loans and savings accounts to digital banking, fraud prevention, and everyday money management.
View More Posts